How to make an animated GIF - the basics
Making an animated GIF is simple when you know how and we're often asked "how do you make a GIF?" - so we thought we'd put together a VERY quick tutorial on the basic steps of making a GIF.
The GIF has made a come back in recent years, mainly thanks to social media, chat platforms and in our design world, Dribbble. Whilst the GIFs we make can be complex, many people want to create a simple GIF to show a before and after shot - that's what we'll be explaining here.
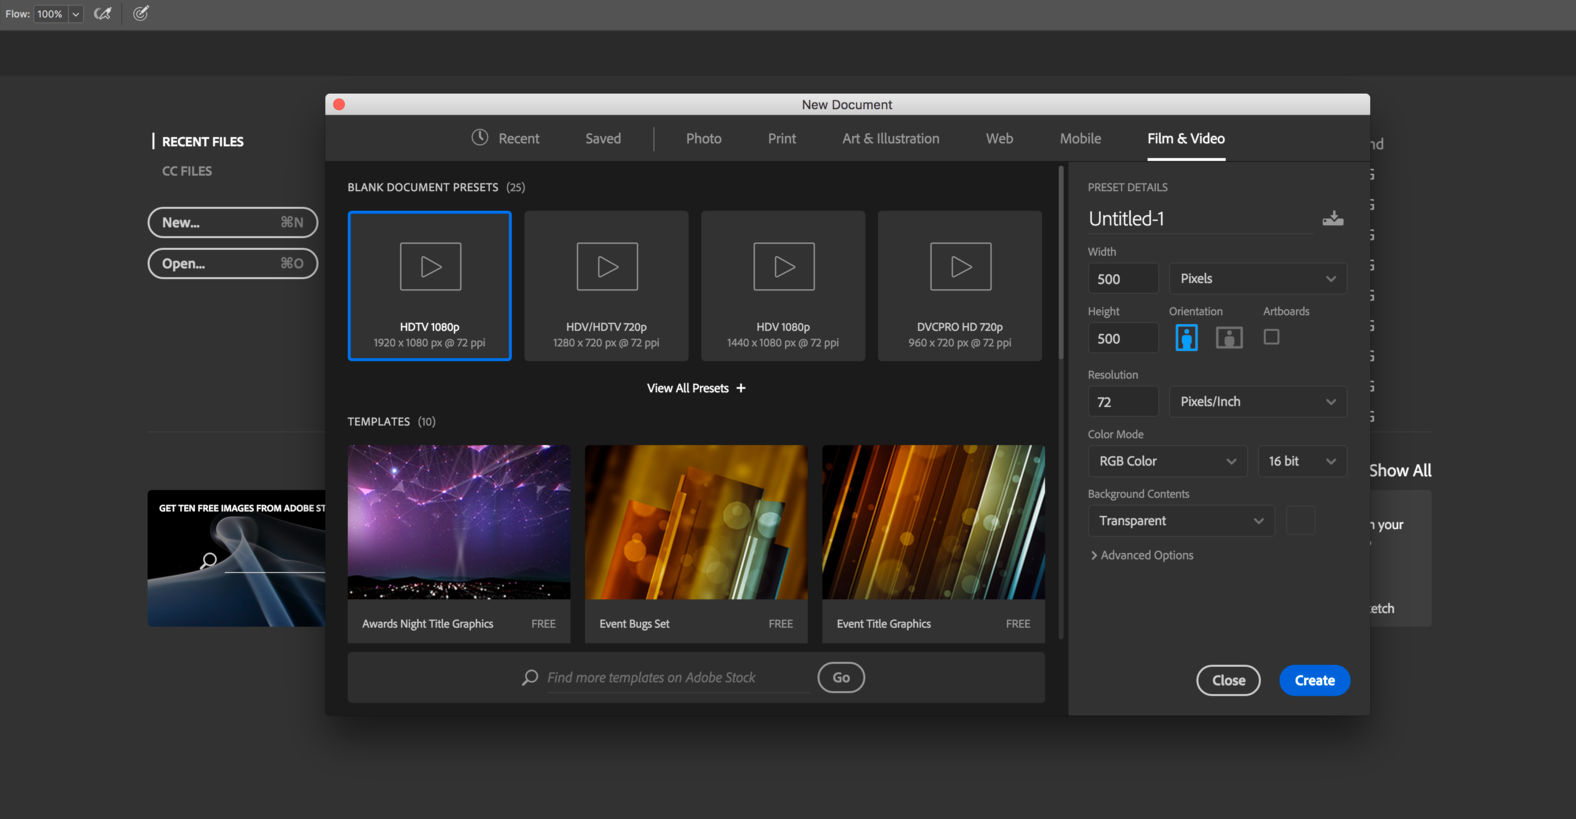
Creating a GIF - Step One
Fire up Photoshop and create a new document. For this tutorial we're going to use 500x500 pixels since my source has that size. All the settings can be changed when exporting the Gif.
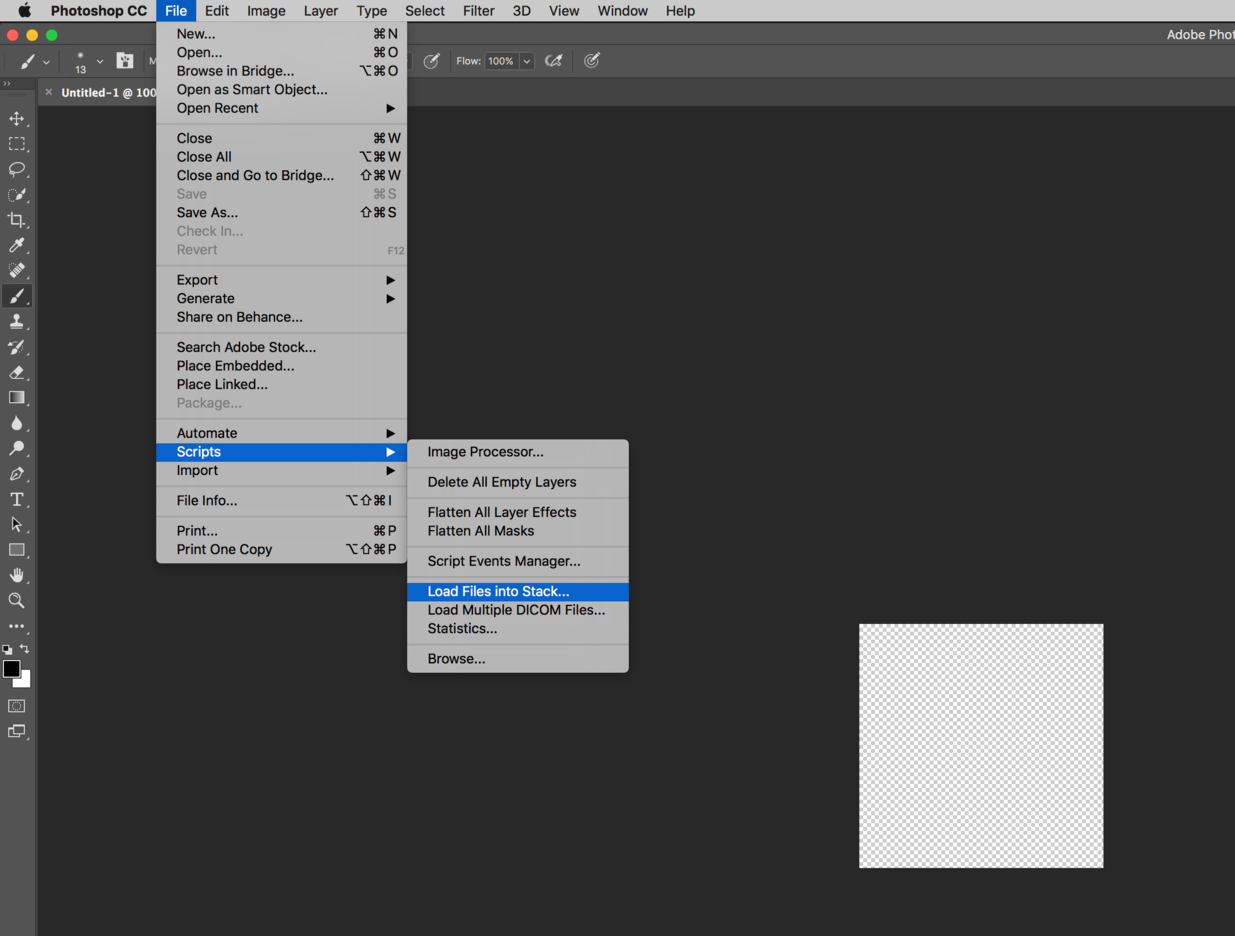
Step Two
Go to ”File”, ”Scripts” and ”Load Files into Stack”. This will import your image files into separate layers automatically
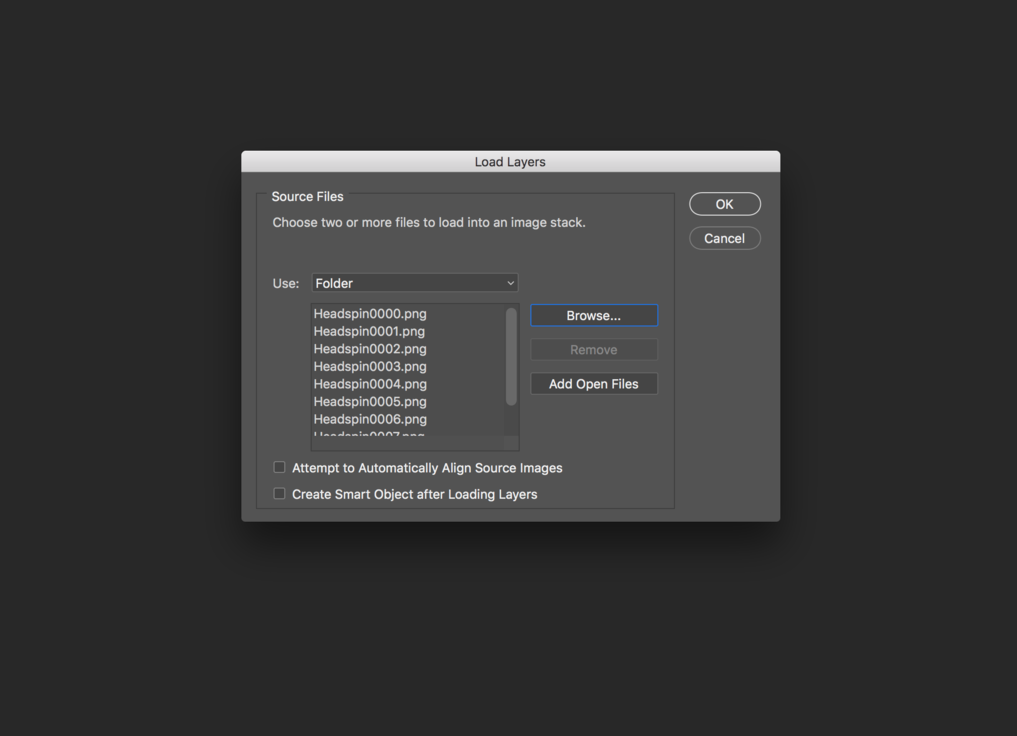
Step Three
Use ”Files” or ”Folder”, depending on what youʼre importing. For this tutorial we're using ”Folder” and making sure that all the files weʼll be using are in the same, and their own separate folder. Click OK.
In this example we've just taken a few head shots on our mobile phoe
Step Four
Now, go to ”Window” and select ”Timeline”.

Step Five
This opens up Photoshops video timeline which, believe it or not, is essential when creating animated GIFs. Click ”Create video timeline”

Step Six
You'll now see that all your layers will be on separate timelines. Before putting them one after another, make sure to set your preferred frame rate (found in the dropdown menu on the top right corner of your timeline) If you change the frame rate later on, it will interrupt the entire timeline and you will have to rearrange the images manually once again.
What frame rate should you use? There is no right or wrong answer really. Frame rates controls the number of frames to show per second. In general a TV production is between 25 - 30 frames per second depending which country you are in. FPS can be lowered to help reduce file size or to create a desired effect. Play around and use the frame rate that suits your needs.

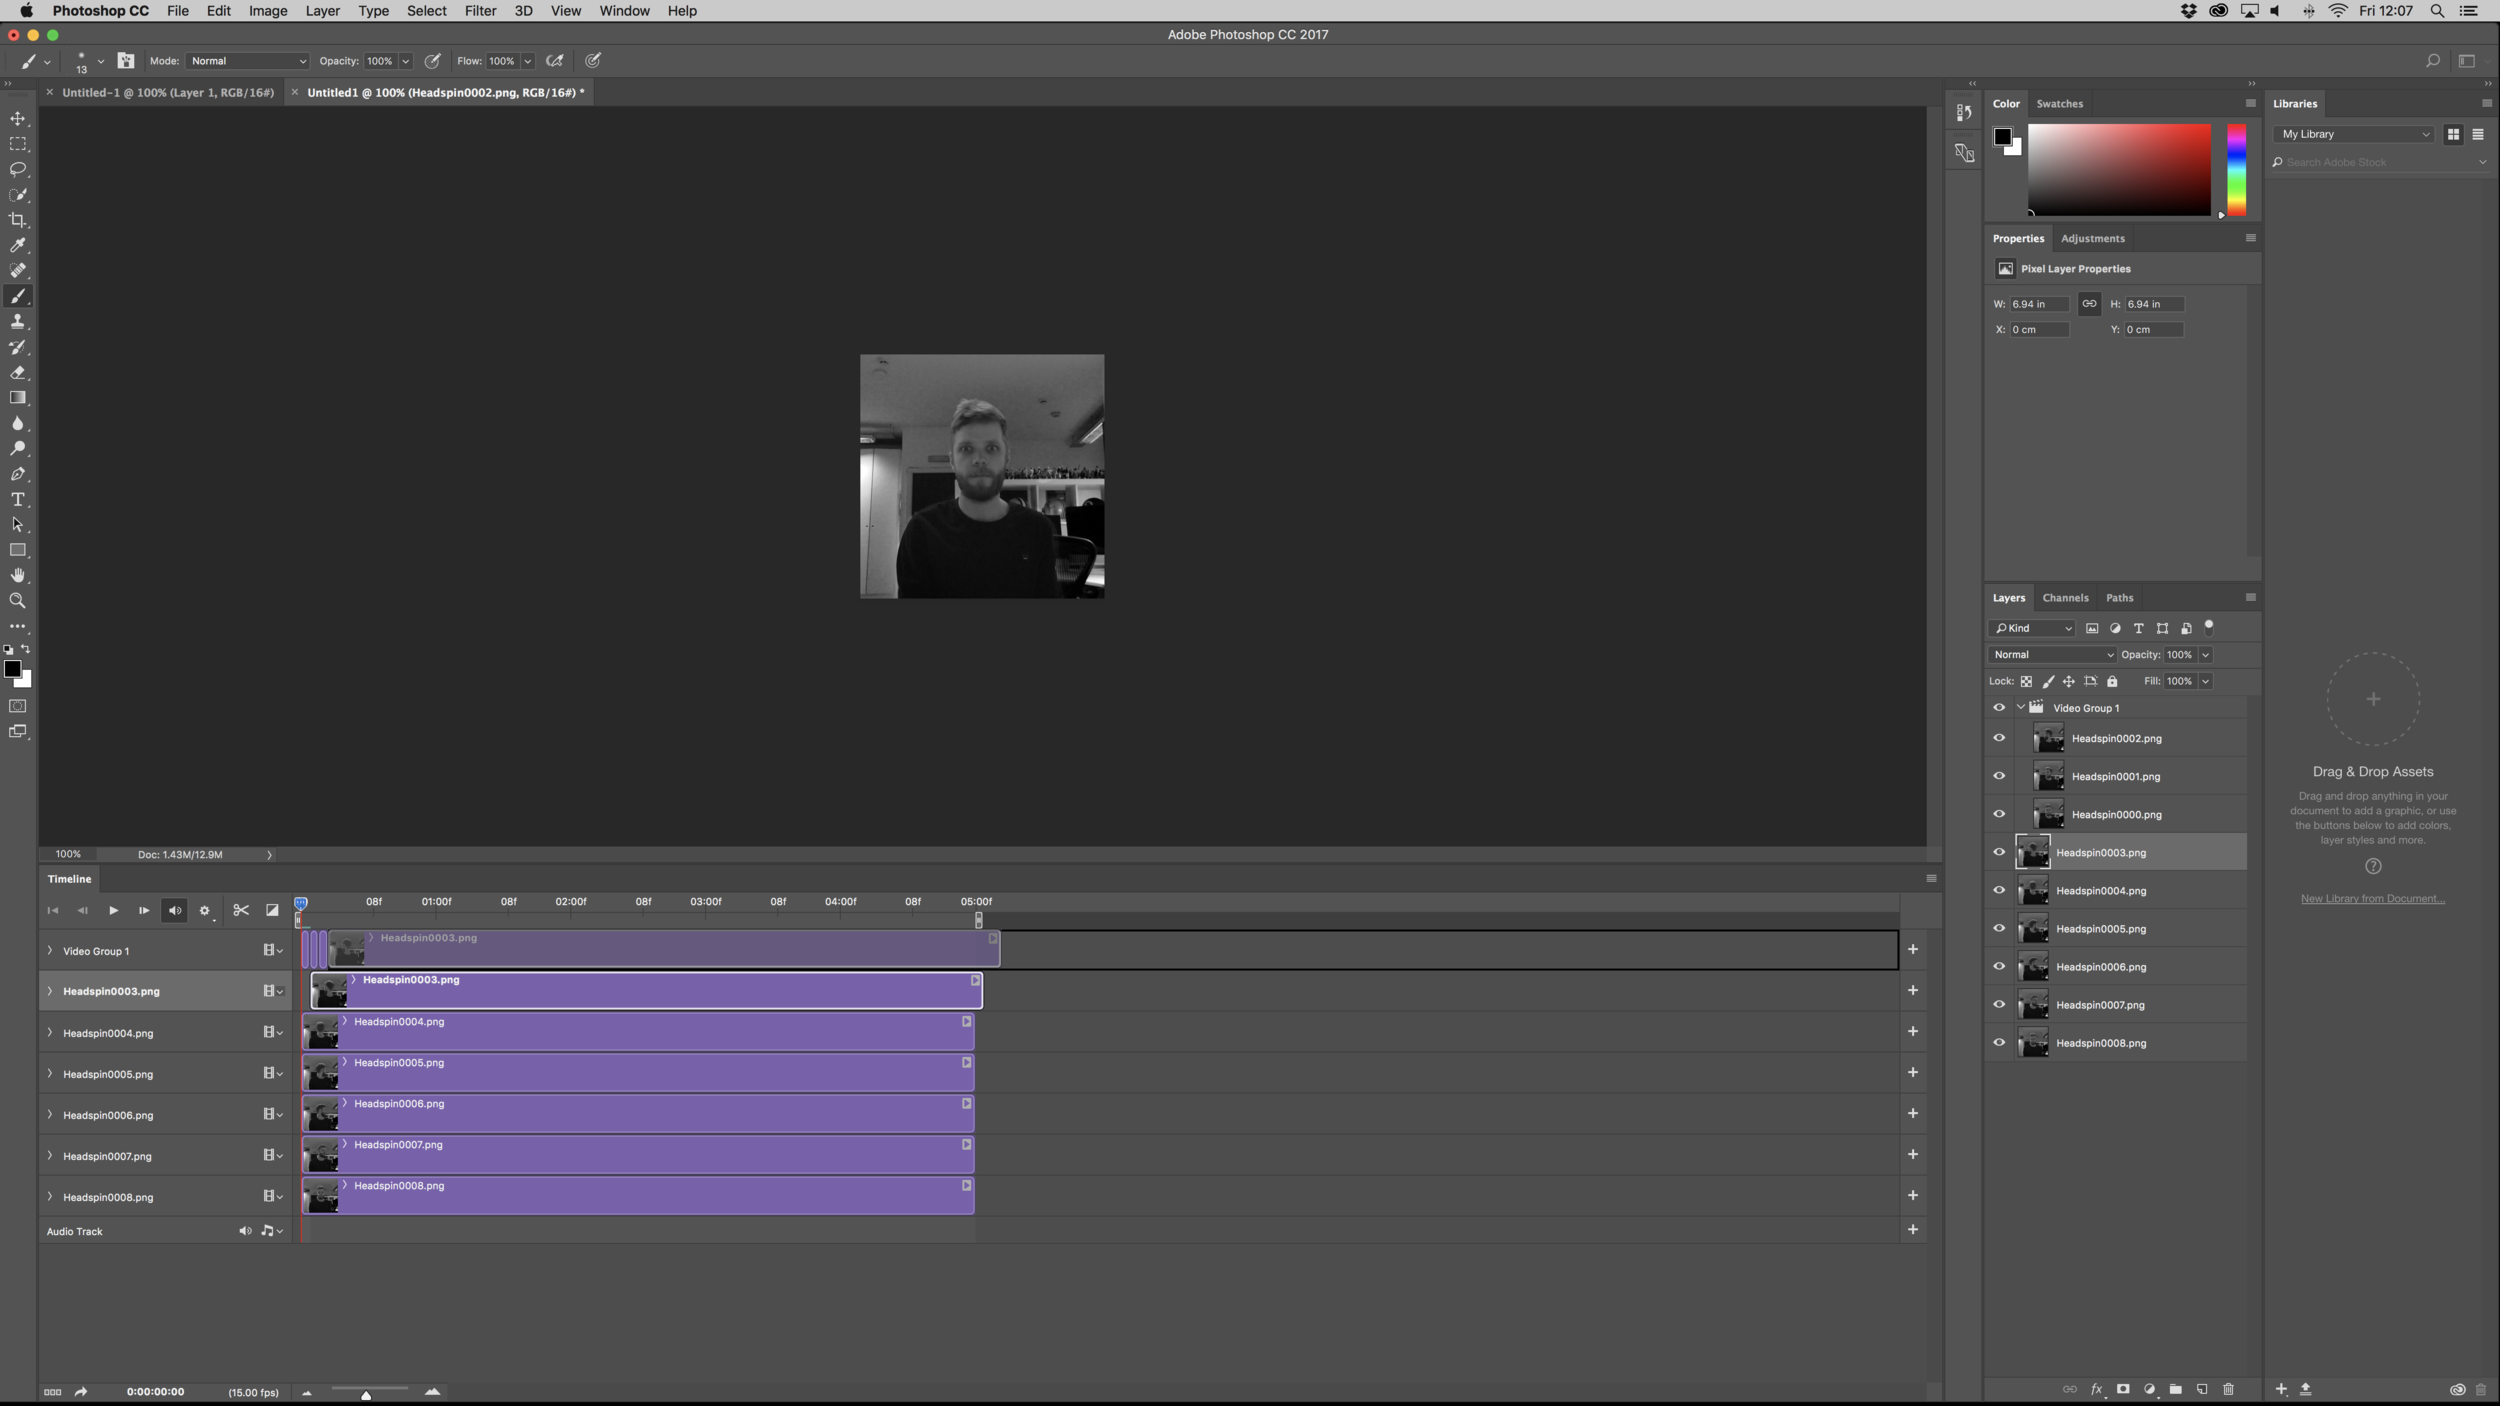
Step Seven
Click and drag one layer at a time and put them after one another. Pulling the right edge of each layer closer to itʼs left edge will make it shorter in length (for this animation we're using one frame per image).
Step Eight
With everything set in your preferred order and timing, go to ”File”, ”Export”, ”Save for Web (Legacy)”

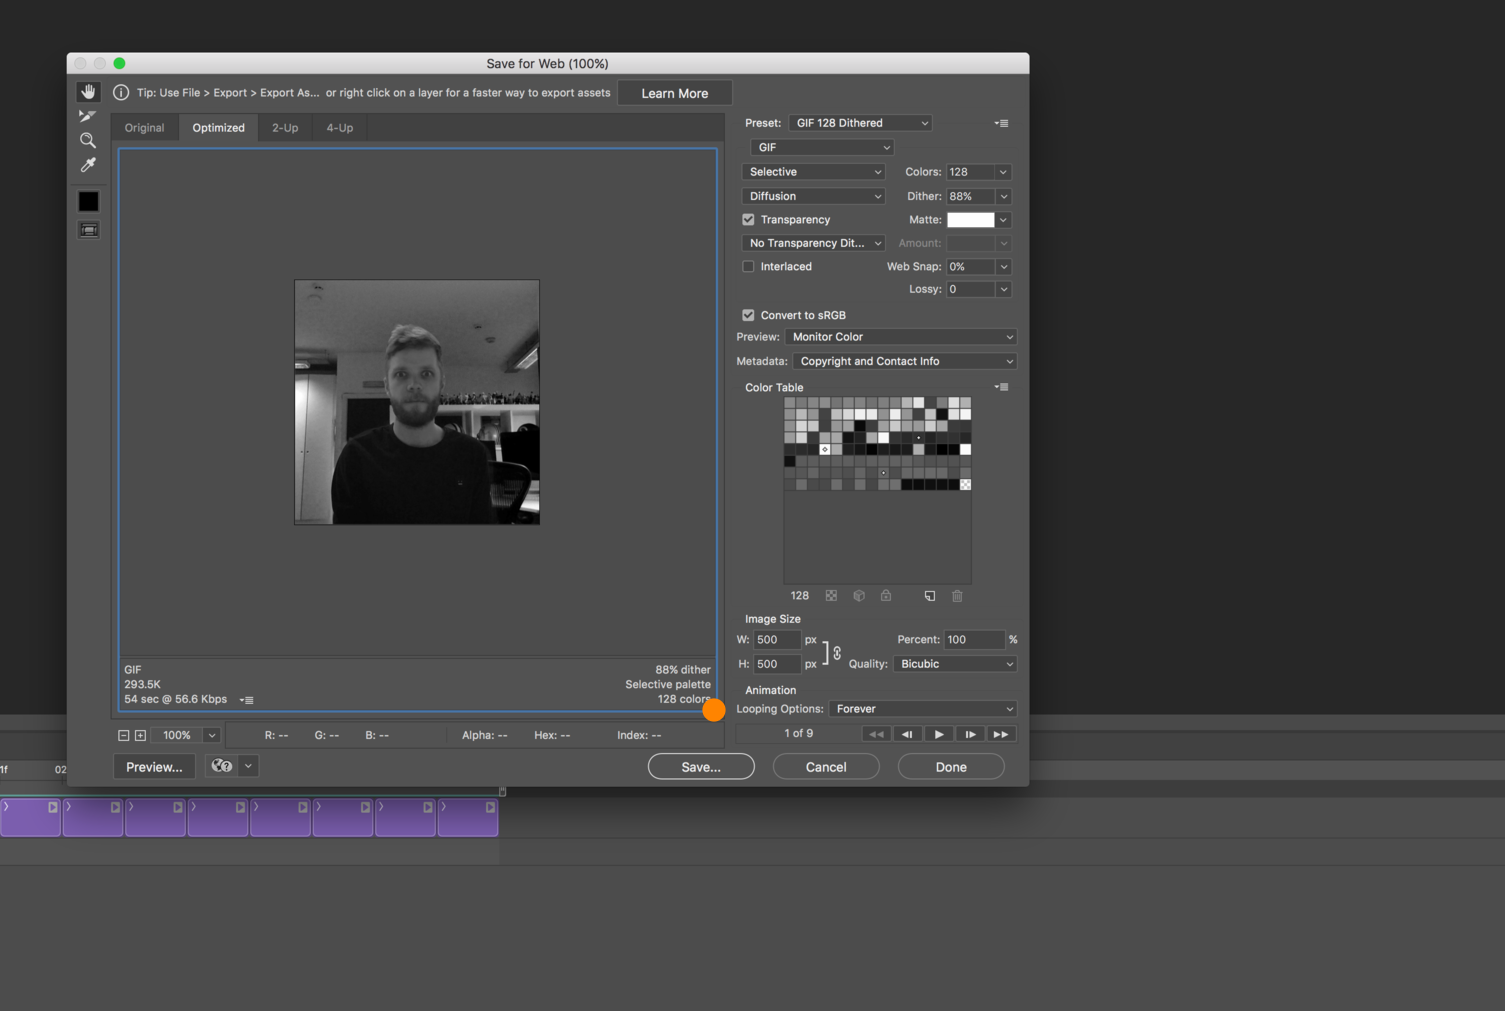
Step Nine
The export preset Iʼm using is a good standard preset. If you want to dig a bit deeper but not too deep, here are some tips:
The numbers represent the amount of colours used, more colours means a higher quality and larger file size.
”Dither” is for using gradients and if you want the colours to blend, while no dither is for solid colours. In this case, since Iʼm using photo transparency it doesn't matter. However, if you are using a transparent background make sure the ”matte” selected is ”none” or the same colour as the background you will be using later.
In the ”Quality” drop-down menu there are different options for pixel interpolation. Bicubic is selected by default and is the best all-round-setting.

Step Ten
Now it's time to set the the looping options - in this example we're using ”forever” for this 'looping' gif. Press 'Save' and choose a name and location for your GIF.
ALL DONE!
You should now have an animated looping GIF. Here's the one we just created
